The original pin I had came from Ink Blots & Polka Dots. It's super cute and she even uses a painting drop cloth to make her pillow! Frugal to boot.
Here's my finished project:
 |
| Ruffle Pillow Cover |
Now, I want to point out why this project is awesome and why you shouldn't be scared of it:
- If I can do it, you can. I mean it!! This is coming from the girl who can NOT sew a straight line. Not a single one of my seams on this project was completely straight, but it's very forgiving.
- Also, this was my first time making ruffles....and it still looks good!
- Look at it! Isn't it cute? Don't you want that sitting on your couch? Or in your favorite chair? Or on your bed? Don't lie. You do.
- It's an upcycle. I used an old bed sheet for mine but you could use an old curtain, blanket, or whatever floats your boat. Or buy pretty new fabric if that's your thing.
- You'll jump around, dance and exclaim "I WIN!!" when you are done, while your husband laughs at you....or that could just be me.
- It cost me $6 (for the pillow insert), but you could easily cover an old pillow you already own.
- If you exclude the ruffles the pillow cover would probably only take about 30 minutes.
Have I convinced you yet?
Ok, then on to the project! I'm going to walk you through it. Easy as pie.

I chose to use an old sheet from a twin set we had laying around. The bonus to this is that I could cut it at the bottom corner which means two sides were already hemmed for me. Woo-hoo! Cheater sewing, is my kind of sewing.
UPDATE: You should iron your fabric before measuring or cutting! I am a super lazy sewer and only ironed the part of the sheet I estimated I would need....because I hate ironing, with a passion. Seriously, part of my requirements for buying a clothing item is that it shouldn't need to be ironed (I break this rule...and promptly regret it). The end, we now return to the regularly scheduled broadcast.
The pillow cover itself is envelope style, so no need for a zipper or button. To calculate how much fabric you will need, go ahead and do this calculation:
2x Pillow Height + 7 inches (for the overlap) + seam allowance = length
pillow width + seam allowance = width
For example, my pillow was 20x20in. so my calculations were:
2x20 + 7 + 1 inch = 48 inches
20 + 2 = 22 inches
I only included a one inch seam allowance on the short side because I was using a pre-done seam (from the sheet) for the other side....I also should have made the seam allowance one inch on the width (for the same reason), but I screwed up and that's why my pillow cover is a little bit loose.
A handy tip for measuring: I don't have one of those fancy mats so I use my measuring tape for pinning and then cut, to keep an odd measurement marked on your tape place a paper clip over it and line the paper clip up with where you need to pin!

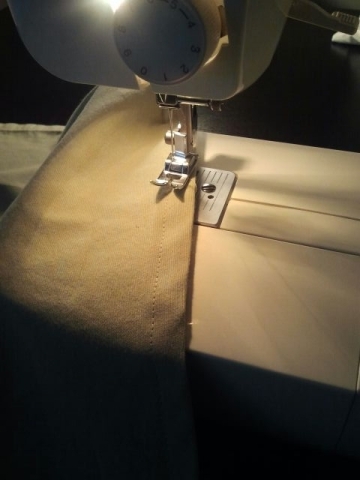
Cut your fabric out. Press your seams on the short sides of your fabric and sew. Remember you have an inch to use on each side.
Now, you will need to add the ruffles. To make the ruffles, cut a long strip of fabric and sew straight down the middle with a long stitch ( I used the longest straight stitch on my machine). Do not reverse over the ends, you want the threads to be loose. I cut my strips from horizontally across my sheet. I cut the entire width of the twin sheet (longer than my pillow cover) and my ruffles were just long enough to wrap around to the back of my cover a little. Keep this in mind when cutting fabric for your ruffles.
I left the edges of my ruffles unfinished to give it a shabby-chic sort of look, but you could hem the edges if you don't want the frayed look.

To make a ruffle, hold the top thread (not the one that came from your bobbin, the one you cut from the needle) and gently push the fabric down to ruffle it. Now, pull the fabric (from the end you just pushed toward) as if you are trying to move the ruffle. You will see the ruffle smooth out some. Repeat these steps until your whole strip is as tightly ruffled as you would like it to be.
Now, figure out where you want your ruffles! I found it easiest to, first, figure out how my pillow cover would be lain out and pin it, then, pin my ruffles to the right side of the cover. The pillow cover should be pinned, bringing the short ends in toward each other, and taking into account your 7 inches of overlap. After overlapping the ends, your cover should now measure the same as your pillow in height.
 |
| The back of the pillow cover pinned together. I flipped it over and placed my ruffles where I wanted them. |
Very Important! - Watch carefully for your pins. Sometimes the ruffles hide the pins and I almost sewed over two or three. This could break the needle on your machine, so be careful!

I sewed a total of three ruffles in the center on my cover. I centered the first one and sewed it down, then pinned the outside two and sewed them on.

Your ruffles may look a little flat now, but you can fluff them up again once they are sewn in place.
Now, pin your cover again so that you have your overlapped ends. This time the WRONG side of the fabric should be facing out. Your ruffles will be on the inside and cause some bulkiness, try to pin the cover together as neatly as you can. I don't have a picture of this because I was so excited to be almost done...
You're almost done! Just sew down the two sides (the pinned edges in the photo above) and turn right side out.
Insert your pillow and admire! :)

Happy Frugal Crafting!
Check it out...
Places I Like to Link
Great job!
ReplyDeleteThank you Hilda!
DeleteWhat a great job you did on this ruffled pillow. I haven't yet tried to sew anything ever! I think you may have inspired me to give it a try! Megan
ReplyDeleteThank you.
DeleteI say go for it! I'm a lazy sewer (I don't use enough pins, I don't iron as much as I should, etc.) but it still turned out great. You can do it! :)
great job! keep on sewing! thank you for linking up with Uncommon! ;)
ReplyDeleteThanks Bonnie and Trish! I love your link party, so many great ideas in one place. :)
Delete