Showing posts with label Craftiness and DIY. Show all posts

Monday

Easy DIY Pet Bed

I actually did this project a while ago, I just never got around to getting all the photos off of my phone.

What can I say? I'm lazy.

Anyway, are you ready for a super easy project? Good.

I have to start by saying that our kitty LOVES fleece. Absolutely, positively, if you have something that is fleece around the house, he will lay on it. He loves the stuff. So, most of the time we just left an old fleece blanket dedicated to him on one end of the couch. It would probably be impossible to get all of the cat hair off of that thing. The blanket was just kind of blah and people would come over and try to use it as a lap throw, not knowing that they would leave covered in cat hair *embarrassing*.

So, as I was perusing Joann's one day I noticed that they had 50% off their remnant fabrics. I went to take a look and found 3/4 of a yard of really cute fleece. And it matched our living room stuff! So an idea was born: I'll make a pet bed for Scar, it will match our decor, AND people won't mistake it for a lap throw. Yay!

I created it as a stuffed inner pillow with fleece as the outer cover. And you could even remove the fleece later and wash it if you wanted to.


Here's what you'll need:
  • less than 3/4 yard fabric - This will be what you sew up and stuff, I used an old pillow case - FREE
  • ~3/4 yard fleece (or something that doesn't fray, like a knit) - Obviously, you should adjust fabrics to the size you want the pet bed. Since its a simple rectangle, its easy to adjust. - $3.00
  • Filling - I used standard poly-fill, but you could use old towels or whatever you would like. - FREE
  • Thread - it doesn't even have to match because it won't show. :) - FREE
Easy, right? No complex supplies here. Plus, if you count all the items I already had as free, it only cost me $3.00!


First, lay out your fleece and pillow fabric. You want there to be an extra 3-4 in. of fleece all around your pillow fabric. You will need two pieces of pillow fabric and two pieces of fleece. Pin and cut fabric to size if you need to.

Because I wanted to use every bit of the fleece, I laid out my fleece (folded in half), then adjusted my pillow fabric to size.

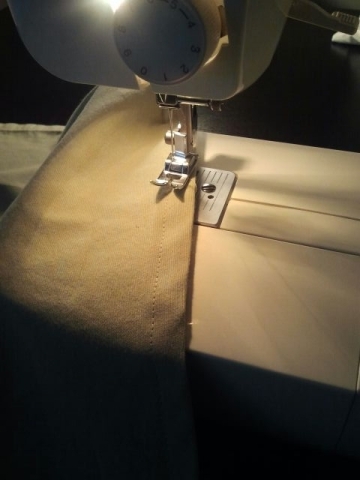
Now, go ahead and sew up the pillow part, leaving a 3-4in opening for turning and stuffing. I only had to sew up two sides since I was using an old pillow case.

Once you've sewed your sides, turn the pillow fabric right side out (seams in). Use your filling material to stuff your pillow. I didn't stuff mine to the brim, since I wanted it to be easy to snuggle down into.

Sew the opening closed. I just did a quick hand sew, since I was too lazy to go upstairs to my sewing machine.

Your pillow part is done! Now onto the fleece cover....


If you've ever made a fleece "tie" blanket, you can make this cover. Center your pillow on both pieces of fleece (its easier to cut them together).

Cut out the corners of fleece, like above. This is extra material. You want the corner of the square to come just up to the corner of the pillow.

Once all of your corners are cut, go ahead and cut strips along each of the sides, like you are making fringe. The strips will be as long as your cut out corners (if that makes sense....) I made my strips about 1/2 in. wide. I usually don't measure, just kind of try to keep them even as you go around.

Now, leave one piece of fleece under the pillow and lay the other over the top.

Start tying! You'll tie one top fringe to one bottom fringe. I tied the corners first, then worked my way down each of the sides.


That's it!

Stand back and admire, then let your furry house-mate enjoy.


Linking Up To: Places I like to link to & Mostly Homemade Mondays

Pinterest Project: Reversible Sewing Machine Cover

Now that I have a fancy craft table, I'm able to keep my sewing machine out all the time. It's amazing how much more I sew, knowing that I don't have to drag the machine out and take over our dining room table for a few days. Pretty awesome.

Now that my machine sits out all the time, I've noticed it gets kinda dusty. Plus, its not the nicest looking item to have out all the time (I still love you, sewing machine!).

I decided it was time for a sewing machine cover.

To start, I looked at the finished products from two different blogs (which I found through Pinterest, of course). I liked the one at Make It and Love It for it's simplicity. But I also really liked the one at Nap Time Journal since it was reversible. I change my mind a lot, so reversible just feeds my fickle side.

I just combined the two styles and kind of went about it in my own way.

Tucked into the corner. I chose the fabric to match the little citrus accents I already had on the table.


Just like the ruffle pillow cover, this project is super easy!! I promise! It took me about two hours total (I had to rip out a seam, arg), but an experienced sewer could probably knock it out in 30 minutes. I'm going to take you through it....

Supplies:
  • 3 Fat Quarters ($6.00) - Because I wanted to make this reversible, buying fabric off the bolt (that I liked) would have cost more than picking up the fat quarters.
  • White Ribbon ($0.50) - I used about 1/4th of a new spool. I'll use what's left over for other projects.
  • White thread (or a color that matches your fabrics)
  • No-Fray
Total: $ 6.50

Again, you could always use fabric in your stash or upcycle a sheet, curtain, etc. to make it free!

Let's get started! This is a pretty long post, with lots of pictures, so bear with me.

First, you will need to measure your sewing machine:


I measured the width of my machine, including the knob on the right, and got 17in.

Then, measure the sewing machine from front to back, going over the top, like this:


I included a spool of thread on the top, in case I wanted to put the cover on, while the machine was still threaded. This means that without the spool, the cover will be a little bit long, I didn't mind. Its completely optional whether you want to include the spool. My measurement was 29in.


After measuring, I went to pick out fabric and ended up getting fat quarters. Fat quarters measure 18in x 21in (all of mine actually measured about 22 inches long). The 18 inches was perfect for my width + seam allowance. However, I knew I would need to add about 9 inches of another fabric to get the right length (29in. + seam allowance). I decided to grab a third color and split it between my two, reversible sides.

If you don't have this problem/ you aren't using fat quarters, you can go ahead and cut out your fabric with a one inch seam allowance. Do a 1 and 1/2 inch allowance if you are going to be adding extra fabric length, like I do below. This helps account for the seams were you add the extra fabric AND the outside edge seams.

Now, you will iron your fabric and cut out any extra fabric you need for your sides. I split the nine inches in half and made two strips, each 4.5 in. tall (18 in wide, to match the other fabric width). I added a strip to each end of my two other fat quarters. The sequence goes like this:

4.5 in. strip (pink)
21-22 in. fat quarter (green or yellow)
4.5 in. strip (pink)

 I had a 3in tall strip of pink left after this (18 in. used to make other strips). If you're using fat quarters like this, make sure that the strips you sew on are the 4.5 in. ones not that leftover three inch one. I accidentally did this and didn't notice until I started ironing. I had to rip out the seam and sew on the right size strip. Pretty frustrating.  Anyway, if you pay more attention than I do, you should be fine.

To sew the strip onto your other fabric, line up the 18 in. edges, right sides (pretty sides) together, and pin. Like this:

Pinned, with right sides together.
Sew the pieces together and repeat at the other end of your fabric. The end product will look like this:


Iron your seams flat. Then repeat all the steps to add fabric strips to your other piece/fat quarter.


Once both of your pieces are sewn up and ironed, you can start laying out your sides to sew the whole thing together. Start by cutting your ribbon.

I chose to use satin ribbon, 10 inches long for each of my ties (4 pieces of ribbon, 10 in. each). I applied no-fray to each of the ends. 
 

Measure on your sewing machine, where you would want your ties to be. I decided I wanted mine to be 7 inches from the bottom. 

Lay out one fabric piece, right side up. Measure your desired length from each end (7 in. for me) and pin your ribbon in place. The ribbon should point inward, like this:

You can still see where the fabric was folded...because I get really tired of ironing, really fast.

Now place your other fabric piece over the first, right side down/facing inward, like so:

Told you I can't sew a straight line....


Pin all your pieces together. Keep in mind that you will need to leave an area open, to allow yourself to turn the cover right side out. I marked a 3 in. space on one of the pink edges. 

Start on one side of your open space (the space you marked to leave un-sewn). Reverse over your first few stitches to lock them in place. You will sew continuously around the whole cover. When you come to a corner, stop with your needle still in the fabric. If its not in the fabric, just lower it with the knob on the right. Lift the presser foot, then rotate your fabric so that the next side is lined up to be sewn. 

Rotating the fabric, needle down, foot up, to sew the next edge.

Keep sewing around all of your sides. Double check that the edges of your ribbon are still lined up before sewing over them. Stop sewing when you get to the other side of the space, marked to be left open. Reverse over your last stitches. 

Gently flip your cover right side out through the space you left open. Iron the cover, being sure to fold under the edges of fabric in the open spot, it should match up with the rest of the sides.

Now, top stitch around the outside edge. Be sure to catch those little edges in the open spot, so that it stays sewn shut.

Ta-Da! You have a simple, reversible, sewing machine cover!

Yellow side.


Green side.
That's it, everyone's getting a sewing machine cover for Christmas!


This project as easy as cake....because, let's be serious, cake is easier to make than pie.

So get to it and make your poor, naked sewing machine a cover! It looks cold.

Happy Frugal Crafting!


Check it out....
Places I Link Party

Tuesday

Old Memo Center to New Dry Erase Calendar

We had this old dry erase/cork board combo laying around the office. Its pretty darn old, too. I got it  around junior high and used it through high school. It then lived with me in college, moving in and out of the dorm every summer. Then T and I got married and kept moving...and the little dry erase board just went with us! Needless to say, it was starting to look a little shabby.

Before.

Once we did our office revamp, I was all set to donate it. Then, T convinced me that there had to be something we could use it for. So the gears in my head got to turning and I realized I had the perfect starting point for the dry erase calendar I've been wanting. Originally, I had planned on DIY-ing one of those picture frame + paint chip kinds like you've probably seen on Pinterest, but I could never find a frame I liked for it.

This was an easy solution to my dilemma and cheap, too!

Supplies:
White Primer - Already had
Acrylic craft paint - Already had
New pencil - Already had
Staple gun and staples - Already had
Rubbing alcohol - Already had
Toothpaste - Already had
Sharpie - ditto above.

Total Cost: Free!! - My kind of project.

I started by cleaning up the dry erase side. I had a monkey sticker stuck to it (because I'm a toddler and like stickers...and monkeys) and some of the dry erase marker wouldn't come off. Above, you can see the sticker residue in the corner.

To get off the sticky stuff, I tried a lot of different things. I didn't want to go buy any Goo-Gone. So, I tried acetone, rubbing alcohol, and a razor blade before I had T type "how to get off sticker residue" into Google. One surprising suggestion was toothpaste. Since the toothpaste was upstairs with me and all the other suggestions were downstairs (lazy!), I rubbed toothpaste all over the sticky part and then wiped it off with a damp cloth. The toothpaste didn't really take off the residue, but it did make it not sticky. I then put rubbing alcohol on a rag and scrubbed the spot until it had all come off. So, apparently the combo of toothpaste and alcohol worked...weird.

After I got all the goo off, I wiped down the whole thing with rubbing alcohol. It takes off old marker really well! Then, I reinforced the back of the frame with new staples, since it was starting to feel a little rickety.


Next, I got it ready for painting. To do this, I just slid some newspaper over the cork board and dry erase part, like so:


For painting, I decided to just use white primer. I wanted it to be white and didn't want to buy paint. If you decide to do this, just be aware that you will end up with a flat finish, no semi-gloss here. I was totally ok with that.

Once it was painted, I figured that it needed a little something else. Plus, there was a big scratch in the crossbar part of the frame, which showed through the white primer. I went through a lot of ideas, but eventually came up with polka dots. To accomplish this, I used the eraser end of a new, cheap pencil. It worked really well for messy dots...

Ready for dotting.

I used a bright green acrylic paint that I had. It dried really fast, so that was a bonus. I simply dipped the eraser into a squirt of paint, dabbed off some excess onto the plate and started stamping. The paint is really slick, so pressing too hard will make the eraser slide and give you really messy dots. Overall, I really liked the varied color of the green. I also used a small paintbrush to go around the little groove in the frame with paint...

After!

Once my dots were dry, I drew a grid for my calendar with a sharpie marker. If your lines get messed up, don't worry, rubbing alcohol takes off the permanent marker (as long as you try to get it off right after you make the mark!). My best suggestion for this is to draw out your grid in dry erase marker, then, go over it in sharpie. Let the permanent marker dry for a minute, then wipe away the dry erase lines. Your sharpie lines will stay in place.

Next to it, I pinned a square of felt for erasing and a free "Dates to Celebrate" printable from Delightful Distractions, filled in with family birthdays.

It's not perfect, but I like it! Next up, a sewing machine cover...

Happy Frugal Crafting!


Check it out...
Places I Link Party

Pinterest Project: Ruffle Pillow Cover

I want to start by saying I am a sewing newbie...I learned to sew on a machine when I was 10 or so, however, I dropped the skill until about 2 years ago....that's a long time!

The original pin I had came from Ink Blots & Polka Dots. It's super cute and she even uses a painting drop cloth to make her pillow! Frugal to boot.

Here's my finished project:

Ruffle Pillow Cover


Now, I want to point out why this project is awesome and why you shouldn't be scared of it:
  • If I can do it, you can. I mean it!! This is coming from the girl who can NOT sew a straight line. Not a single one of my seams on this project was completely straight, but it's very forgiving.
  • Also, this was my first time making ruffles....and it still looks good!
  • Look at it! Isn't it cute? Don't you want that sitting on your couch? Or in your favorite chair? Or on your bed? Don't lie. You do.
  • It's an upcycle. I used an old bed sheet for mine but you could use an old curtain, blanket, or whatever floats your boat. Or buy pretty new fabric if that's your thing.
  • You'll jump around, dance and exclaim "I WIN!!" when you are done, while your husband laughs at you....or that could just be me. 
  • It cost me $6 (for the pillow insert), but you could easily cover an old pillow you already own.
  • If you exclude the ruffles the pillow cover would probably only take about 30 minutes.

Have I convinced you yet?

Ok, then on to the project! I'm going to walk you through it. Easy as pie.


 I chose to use an old sheet from a twin set we had laying around. The bonus to this is that I could cut  it at the bottom corner which means two sides were already hemmed for me. Woo-hoo! Cheater sewing, is my kind of sewing.

UPDATE: You should iron your fabric before measuring or cutting! I am a super lazy sewer and only ironed the part of the sheet I estimated I would need....because I hate ironing, with a passion. Seriously,  part of my requirements for buying a clothing item is that it shouldn't need to be ironed (I break this rule...and promptly regret it). The end, we now return to the regularly scheduled broadcast.

The pillow cover itself is envelope style, so no need for a zipper or button. To calculate how much fabric  you will need, go ahead and do this calculation:

2x Pillow Height + 7 inches (for the overlap) + seam allowance = length

pillow width + seam allowance = width

For example, my pillow was 20x20in. so my calculations were:

2x20 + 7 + 1 inch = 48 inches

20 + 2 = 22 inches

I only included a one inch seam allowance on the short side because I was using a pre-done seam (from the sheet) for the other side....I also should have made the seam allowance one inch on the width (for the same reason), but I screwed up and that's why my pillow cover is a little bit loose.

A handy tip for measuring: I don't have one of those fancy mats so I use my measuring tape for pinning and then cut, to keep an odd measurement marked on your tape place a paper clip over it and line the paper clip up with where you need to pin!


Cut your fabric out. Press your seams on the short sides of your fabric and sew. Remember you have an inch to use on each side.


Now, you will need to add the ruffles. To make the ruffles, cut a long strip of fabric and sew straight down the middle with a long stitch ( I used the longest straight stitch on my machine). Do not reverse over the ends, you want the threads to be loose. I cut my strips from horizontally across my sheet. I cut the entire width of the twin sheet (longer than my pillow cover) and my ruffles were just long enough to wrap around to the back of my cover a little. Keep this in mind when cutting fabric for your ruffles.

I left the edges of my ruffles unfinished to give it a shabby-chic sort of look, but you could hem the edges if you don't want the frayed look.


To make a ruffle, hold the top thread (not the one that came from your bobbin, the one you cut from the needle) and gently push the fabric down to ruffle it. Now, pull the fabric (from the end you just pushed toward) as if you are trying to move the ruffle. You will see the ruffle smooth out some. Repeat these steps until your whole strip is as tightly ruffled as you would like it to be.

Now, figure out where you want your ruffles! I found it easiest to, first, figure out how my pillow cover would be lain out and pin it, then, pin my ruffles to the right side of the cover. The pillow cover should be pinned, bringing the short ends in toward each other, and taking into account your 7 inches of overlap. After overlapping the ends, your cover should now measure the same as your pillow in height.

The back of the pillow cover pinned together. I flipped it over and placed my ruffles where I wanted them.
On to sewing the ruffles! Its super easy, although I was really nervous before I tried it. All you have to do is sew straight down the center of your ruffle. I don't have any special needles or feet for my machine and it handled the bulk of the ruffles even with the foot down. Be sure you are sewing your ruffles to the right side! It should be the pretty side of your fabric.

Very Important! - Watch carefully for your pins. Sometimes the ruffles hide the pins and I almost sewed over two or three. This could break the needle on your machine, so be careful!


I sewed a total of three ruffles in the center on my cover. I centered the first one and sewed it down, then pinned the outside two and sewed them on.


Your ruffles may look a little flat now, but you can fluff them up again once they are sewn in place.

Now, pin your cover again so that you have your overlapped ends. This time the WRONG side of the fabric should be facing out. Your ruffles will be on the inside and cause some bulkiness, try to pin the cover together as neatly as you can. I don't have a picture of this because I was so excited to be almost done...

You're almost done! Just sew down the two sides (the pinned edges in the photo above) and turn right side out.

Insert your pillow and admire! :)


Happy Frugal Crafting!


Check it out...
Places I Like to Link

Thursday

Pinterest Project: Kitchen Art

My latest Pinterest Project is for kitchen wall art. The walls of our little rental have been drab and sad for far too long! I tried shopping for wall decor, but I didn't want to spend $30-$50 on wall art that just seemed so store-bought. You know what I mean?

I got the idea from Spunky Junky. She has an awesome silverware art tutorial over here. Please go take a look at her tutorial! Its hilarious and she has a pretty rockin' blog. Do it.

Ok, on to my version:

TA DA!

 I promise to get a picture of them on the wall later. Our dining room window is super shaded and you have to take photos at just the right time of day.

Here's the supplies priced out:

I don't have a craft table (yet) so I do a lot of my crafting on the floor. Now you get to see our crummy carpet. Yay!

  • Silverware - ($1.50) 5 each of forks, knives and spoons; I picked these up from the thrift store for 10 cents a piece. I think it looks better if you have different styles of silverware mixed together.
  • 3 frames - ($3.00) I bought 8 1/2x11 document frames from Dollar Tree.
  • Paint and primer - ($7.00) I spent a little more money on the paint and primer to get Rustoleum's paint for metal, plastic and wood. I also picked a color that I wanted to use for multiple projects.
  • 3 Fabric Quarters - ($5.00) I had a coupon from JoAnn's. Again, I plan to use the rest of this fabric for other projects in my kitchen.
  • Matte Modpodge 
  • Hot glue
So for a total of $16.50, I got a collection of art for my dining room! Woohoo!!

I was in a hurry when I painted my frames, since it was supposed to rain and all we have is our uncovered patio for painting....So, I ended up with a few little areas where the primer shows through. I actually really like it! It gave the pieces a little bit of a worn feel without having to distress anything. Happy accidents. :)

I basically followed Spunky Junky's tutorial, so I don't want to steal her thunder for this. Its all her!  Go check out her tutorial.

The only thing I changed was I used Modpodge to attach my fabric to the glass for each frame, simply because its what I had on hand.

Here's a picture of the glass. It gives you  better look at the fabric. It was this super cute pale yellow stripe with white outlines of dandelions.

My fabric modpodged to the glass. I trimmed my edges after letting the modpodge dry.
Again all my pics are with a phone so bear with me on photo quality.

In our dining room. I think I'm going to add large canvases to either side to bulk it up/ cover the phone jack we don't use.


NOTES: I had to re-glue two pieces of my silverware after fiddling around with how to hang it up and smashing it with my level  dropping my level on it. SO, this project is a little delicate (or just don't drop crap on it). Also, each piece weighed a little over a pound. I didn't trust the cheapie wall hangers on the back of the dollar store frames. Plus, less holes in our walls = less patching when we move out. I used 3M picture frame stickies to hang them up.

Happy Frugal Crafting!!

Check it out.
Linking to : Thrifty Thursday Blog Hop at Saved By Love Creations
                    Share what you did this week at Two Sasters
                   Blog Link Party at Somewhat Simple
                   Simply Sensational at Organizing Homelife

Friday

Pinterest Project: Felt Flower Wreath

As you may have seen in my About Me, I really like Pinterest.

OK, I'm a little obsessed with Pinterest.

If someone would pay me to do Pinterest projects for a living I would be in heaven. HEAVEN.

One of the first projects I made from there was this cute felt flower wreath. The original pin I used for inspiration links to this pic on The Berry. I simply used the picture as a starting point and made things up as I went.


Pinterest Inspired Felt Flower Wreath
My favorite part of the project: it cost me a whopping $3.00! Cheap home decor for the win! [cheap home decor is another thing that makes me less grouchy :)]

I don't have step by step photos of this project but I'm linking the two flower tutorials I used/started with, so you can always stop by those bloggies for more info!

Supplies
  • Grapevine wreath - ($2.00) I purchased two skimpy wreaths from Dollar Tree and hot glued them together to add bulk. You could also shop a sale at Hobby Lobby and get a sturdy wreath for about the same price.
  • Felt - ($1.00) Sale at JoAnn's, 4 squares for a dollar.
  • Ribbon - Already had from previous project.
  • Hot glue gun

There are several different tutorials I used for the flowers I made. I started out following them exactly, but decided I liked playing around with the felt since it gave the flowers a not-so-precise look. You know what I mean?

Close up of the flowers.
Tutorials:

 Really, this project is simple as pie. Arrange flowers to your liking. Add leaves, stems, ribbons, whatever floats your boat. Hot glue together. Voila! You've got a frugal, fun, and cute home decor project!


Oh, and did I mention they make great gifts! Here's one that I made for my MIL. Red, white, and blue for a patriotic theme. [Excuse the poor photo quality on all of these, I am currently sans camera and using my phone for all pics.]


Happy Frugal Crafting!


Check it out:
Linked up to these parties: Home Decor and Organizing; DIY under $5; Somewhat Simple; Will Craft for Fun

Go take a peek at some of the awesome projects there!